FSINN setup
What is FSINN and why have we changed?
We had been using FSHOST to support Multiplayer ever since UKATC was launched. At that time it was state of the art as a hosting mechanism. Any serious Flight Simmer
will tell you that it has its benefits and its faults. The most compelling
benefit is that FSHOSTSPY reports numbers of pilots and flightplans - this can
and does attract new pilots whom tend to gravitate towards the busiest websites.
FSINN is a newer technology which has evolved
over the recent years, to become the preferred multiplayer option amongst those
whom take this hobby seriously.
The benefits of using FSINN make it an
attractive proposition to serious simmers...
Other player's position on the ground and in the
air relative to yourself appear realistic and their movements smooth. No
jumping around the sky like a demented flea. Observing landings becomes a
worthwhile exercise - a genuine approach and smooth landing! Formation
flying and mid-air refuelling takes on a whole new meaning.
Weather scenarios become ultra realistic
(something not possible under FSHOST). Weather can be set up for any
airport area - you can fly from bright sunshine, into a thunderstorm and out the
other side. Wind directions can be set differently making crosswind events
even more exciting. We can have multiple cloud layers and different
visibility levels. Precipitations can vary between areas.
Finally, a serious benefit is getting around
those annoying connection issues where you find yourself "kicked" from a session
because someone joined using an unconfigured router.
How does it work?
FSINN is a client add-on module which manages
multiplayer connections - we no longer need to connect via the traditional method,
although it will still be possible to do so even with the FSINN client
installed. The two methods can co-exist happily. Note
that once installed, you will need a unique ID to identify you to the
server. This can be obtained from any of the following managers...
Ian
Cooper (G-X439)
Dave Belbeck (AC308)
Mike Vlug (PH-105)
Eric Stein (Towerctrl)
...as a temporary measure, you can connect with
a universal ID and password. There are 9 universal IDs set up, one of them
should be successful. They are all 6 digit numeric IDs starting at 111111
up to 999999 - the password for them all is "password".
Note - these instructions have been written
for those who are running Flight Sim on Windows XP. If you are using Vista
or Windows 7 then there are some additional steps that need to be taken after
installation to enable certain features which are blocked by additional security
in those systems. None of them will stop you flying - just speak to any
manager when on-line (or search for the latest comments).
Client Installation
The install process is quite simple, the zip
file is called FSINN.zip. It
comprises files, each is an executable. All the relevant instructions are listed
below...
1. Download FSINN.zip and place in a temporary
folder on your HD.
2. Unzip the contents and extract (or run from
within winzip) first SetupFSCopilot17B2_4.exe follow the on-screen
instructions and accept all the default settings.
3. Run
SetupFSInn13B2_3.exe follow the steps listed here...
| Step 1 |
 |
Welcome Splash |
| Step 2 |
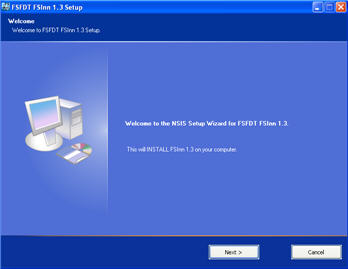 |
You should see this
intial screen confirming FSFDT FSInn 1.3. Click Next |
| Step 3 |
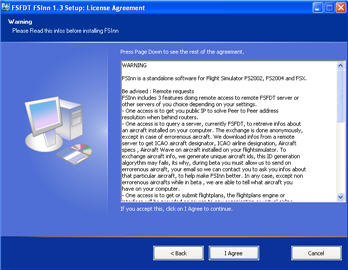 |
To accept the Terms &
Conditions, click I Agree |
| Step 4 |
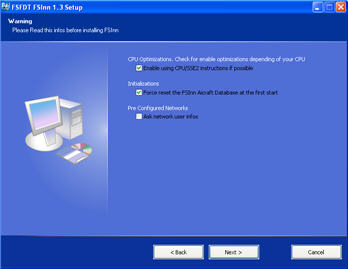 |
Check the first 2
boxes, uncheck the "Pre Configured Networks" - click on Next |
| Step 5 |
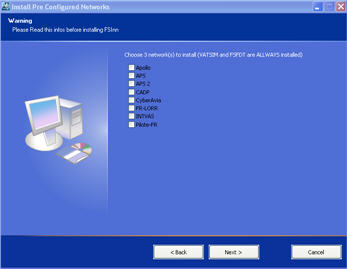 |
Leave ALL boxes
UNCHECKED - click on Next |
| Step 6 |
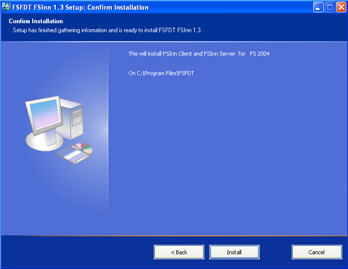 |
This tells you where
the program is installed - don't argue - just click Install |
| Step 7 |
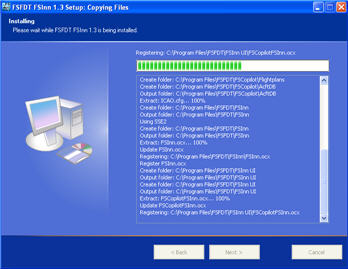 |
You will see this
progress chart as the installation progresses. When complete
click Next |
| Step 8 |
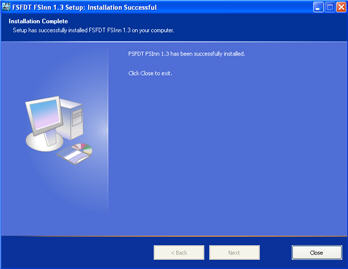 |
Install complete
message - click Close. |
Configuration Settings
| Initialise |
|
On |
| Step 1 |
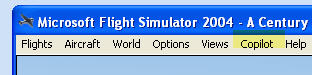 |
After installing, fire-up FS9 and
identify the "Copilot" menu item and click on it |
| Step 2 |
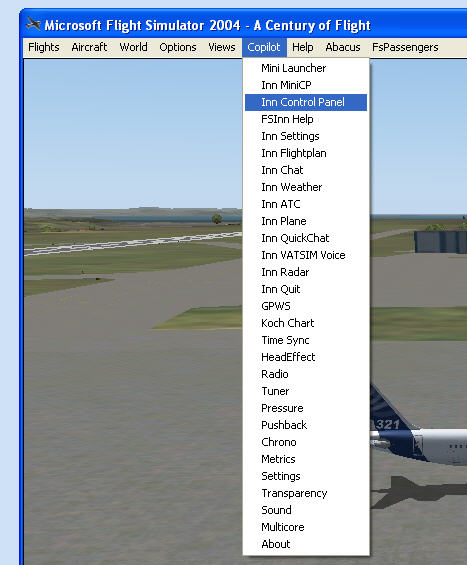
|
Look for "Inn Control Panel" and click
on it.
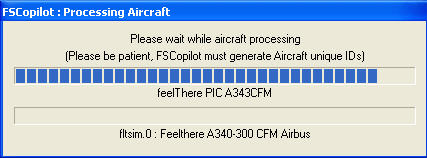
The system will update itself from your
aircraft library - let it continue - it make take a while depending on
the size of your library.
Now you will be connected to multiplayer
within Flight Sim (this is just local to your own PC)
On completion you should just see the
Control Panel |
| Step 3 |
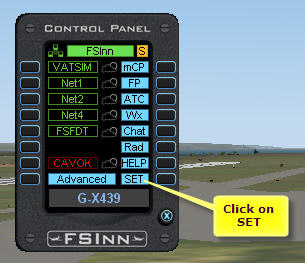 |
We now need to configure the settings to make this unique to you.
Clik on SET... |
| Step 4 |
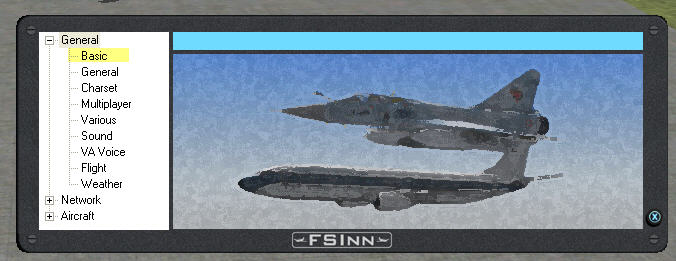 |
This is the Setup panel - all personal
settings are stored here. Not all the optiosn require input, but
we will visit them all anyway - so Click on "Basic". |
| Step 5 |
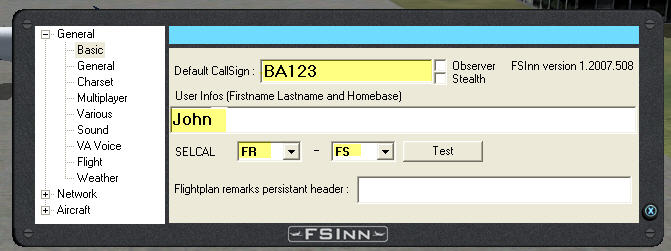 |
Input your Default CallSign - this is
what others will see you as when in Multiplayer. Enter your name
or alias and the default SELCAL as shown.
Click on "General" |
| Step 6 |
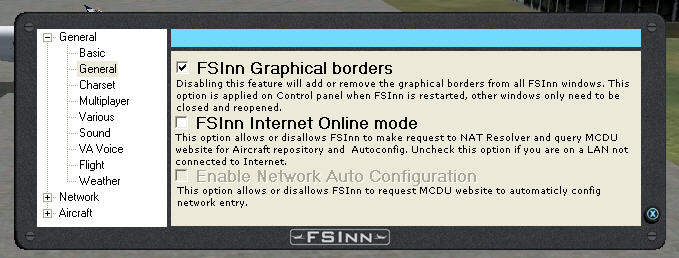 |
Make the options as shown.
Click on "Charset". |
| Step 7 |
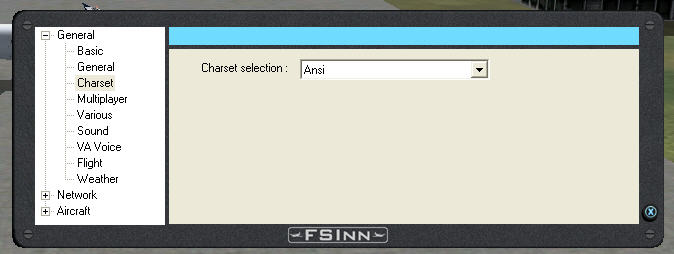 |
This should default to "Ansi" as shown.
Click on "Multiplayer" |
| Step 6 |
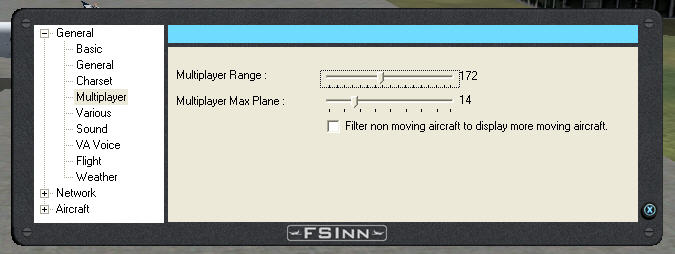 |
This setting will depend on just how
powerful or up-to-date your PC is. The higher these values then
the more your computer will struggle. We suggest you start off
with the values shown. Move the sliders.
If you set the checkbox ON, then static
aircraft wil not be displayed. Again this is to save processing
power. If you have an old PC then set this to ON.
Click on "Various" |
| Step 7 |
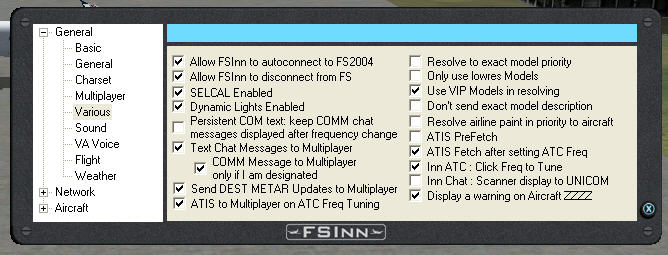 |
Set the values as shown.
Click on "Sound". |
| Step 8 |
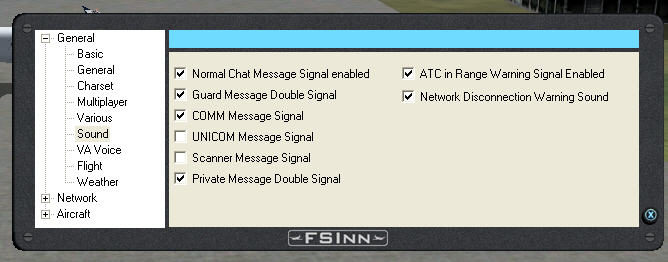 |
Set the values as shown.
Click on "VA Voice" |
| Step 9 |
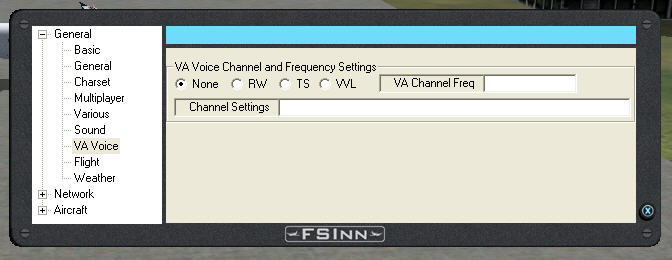 |
Set the values as shown
Click on "Flight" |
| Step 10 |
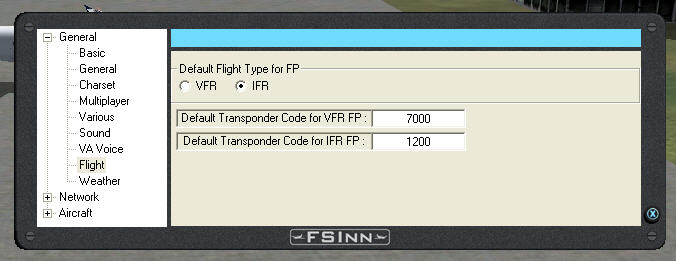 |
Set the values as shown.
Click on "Weather" |
| Step 11 |
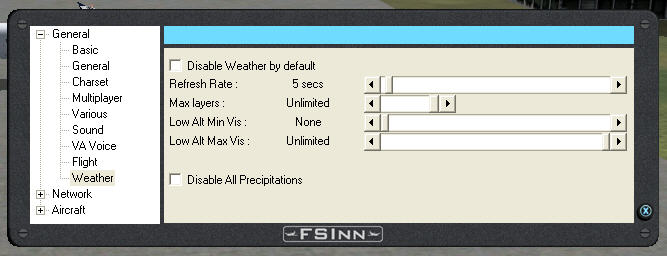 |
Set the values as shown
Click on "Network" and
expand the sub items. |
| Step 12 |
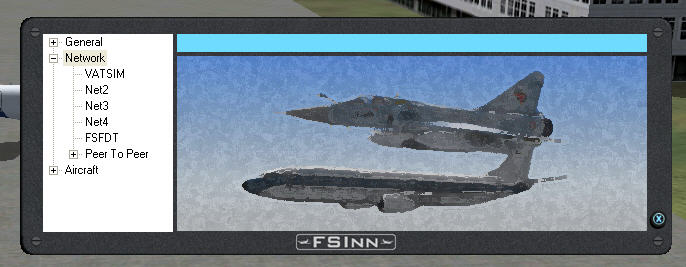 |
This is where we store all the
connection info to join UKATC.
Ignore the VATSIM option, that is just the default.
Click on "Net2" |
| Step 13 |
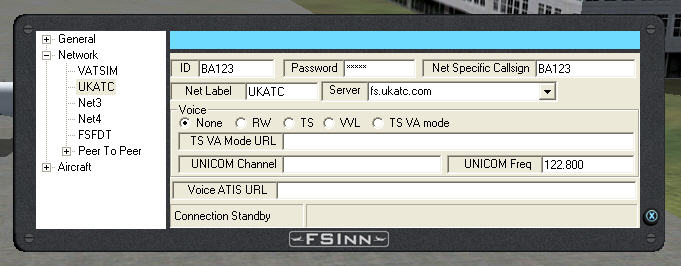 |
The ID field is how you are identified
to the server. This should be set up in advance, but you can
use a temporary ID - see top of pager. Temporary ID's all have
their passwords set to "password". All assigned passwords are set to
"ukatc". The "Net Specific
Callsign" should be set to how you wish to be seen by other players.
If you use other FSINN servers, then you can use a different callsign on
each.
The "Net Label" should be set to "UKATC"
- and it will replace the word Net2 in the Control Panel.
Net3, Net4 and FSFDT can be ignored -
Click on "Peer to Peer". |
| Step 14 |
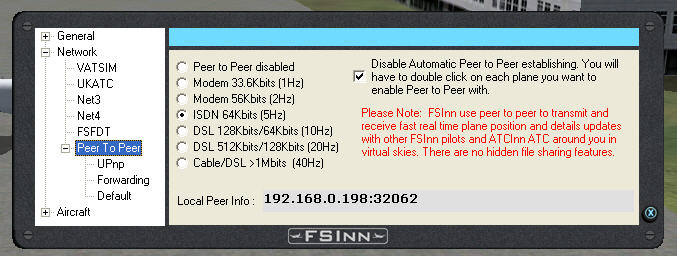 |
Set the values as shown.
Click on "UPnP" |
| Step 15 |
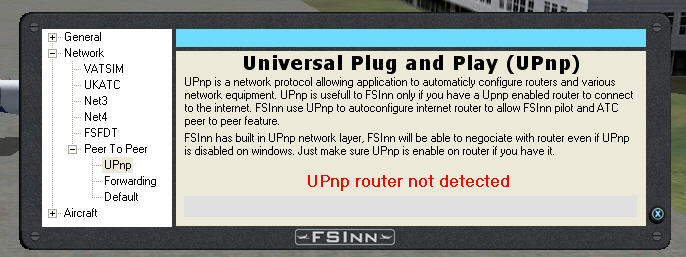 |
You should see this (or a similar
message).
Click on "Forwarding" |
| Step 16 |
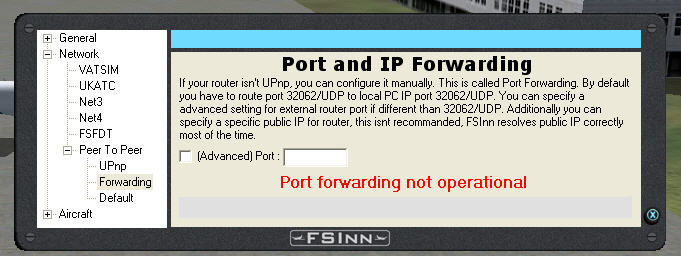 |
You should see this (or a similar
message).
Click on "Default"
|
| Step 17 |
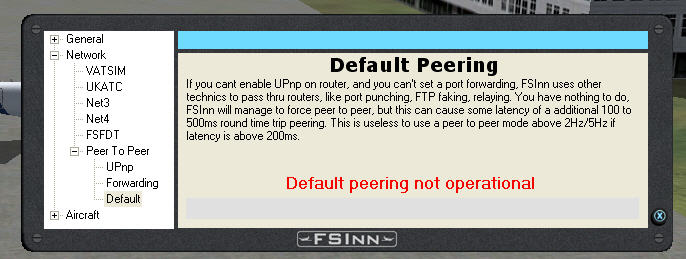 |
You should see this (or a similar
message).
That's it - your done!
Click on the "x" (bottom right) to close
this panel. |
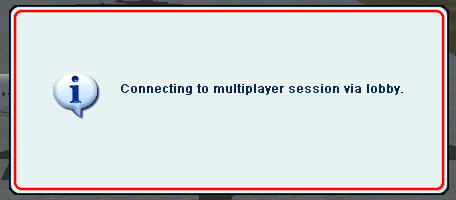
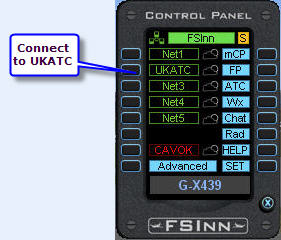
Launching Multiplayer
Now select Inn Control Panel from the Copilot
menu and click on the button left of UKATC to connect to our server...
...if the connection is successful you should
hear a "ding-dong" cabin-alert and
a white cloud should appear to the right of the label and the word UKATC
should color invert.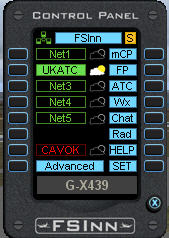 .
.
Congratulations - you are now connected to
UKATC.